
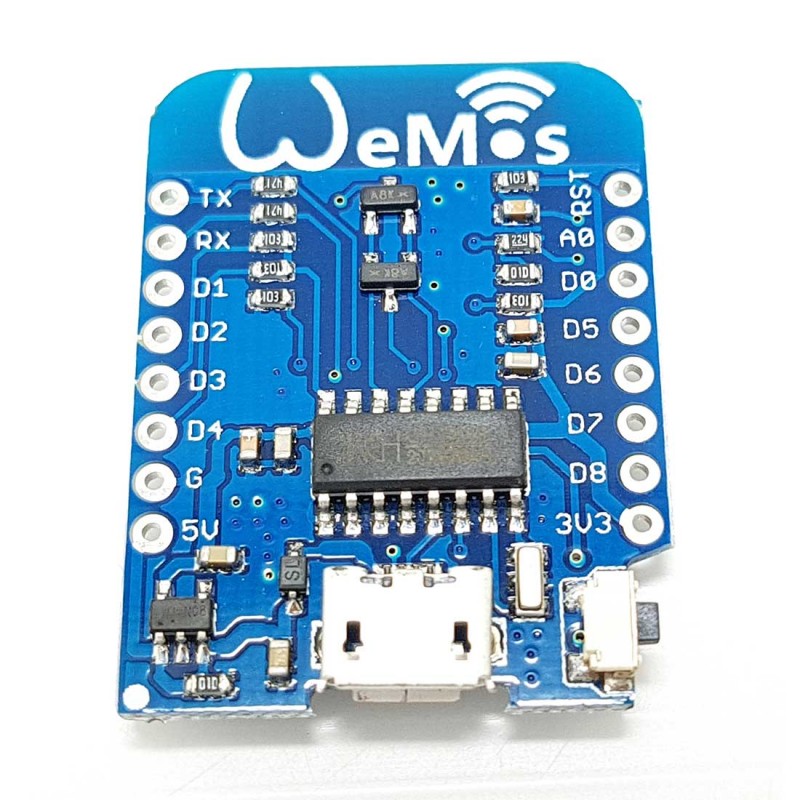
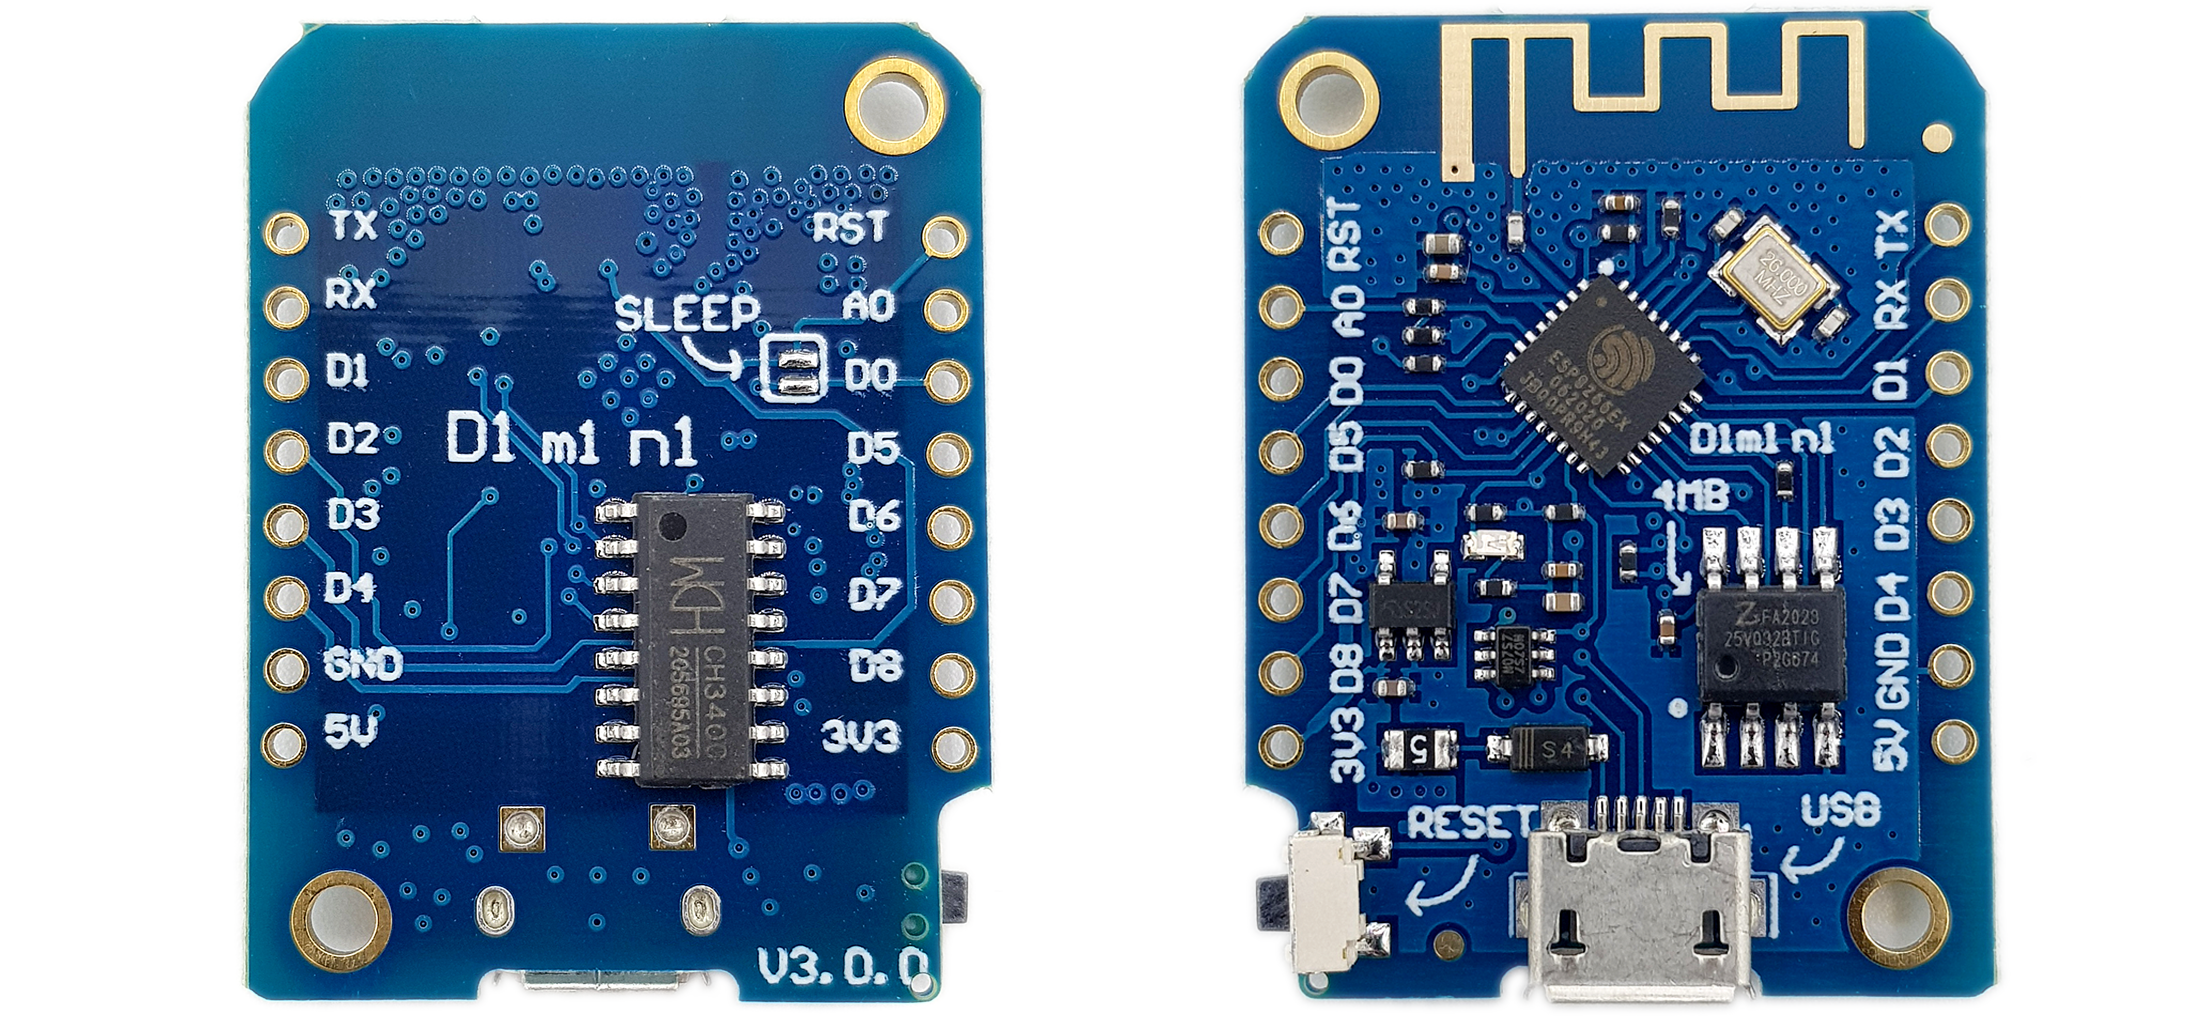
Wemos D1 Mini V2 NodeMCU ESP8266
Get started with MicroPython [D1/D1 mini series] Get started with Arduino [D1/D1 mini series]
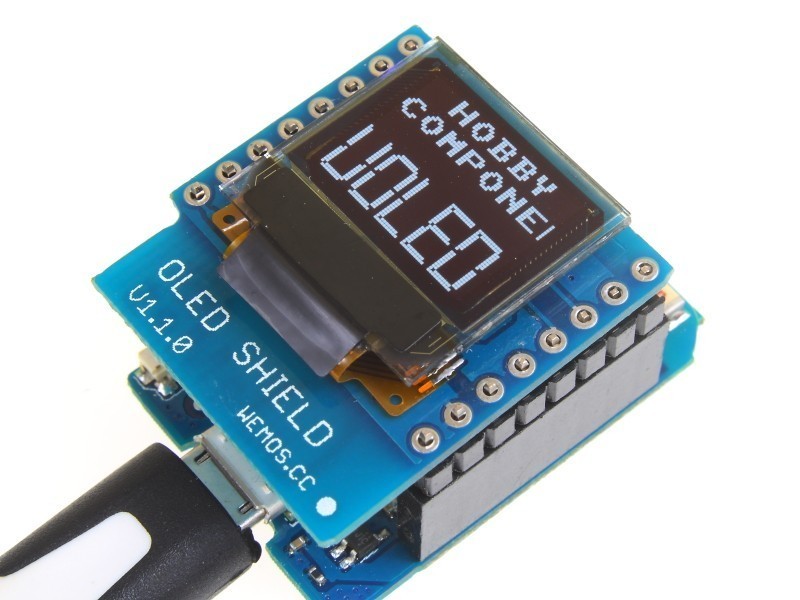
WeMos D1 Mini OLED Shield Hobby Components
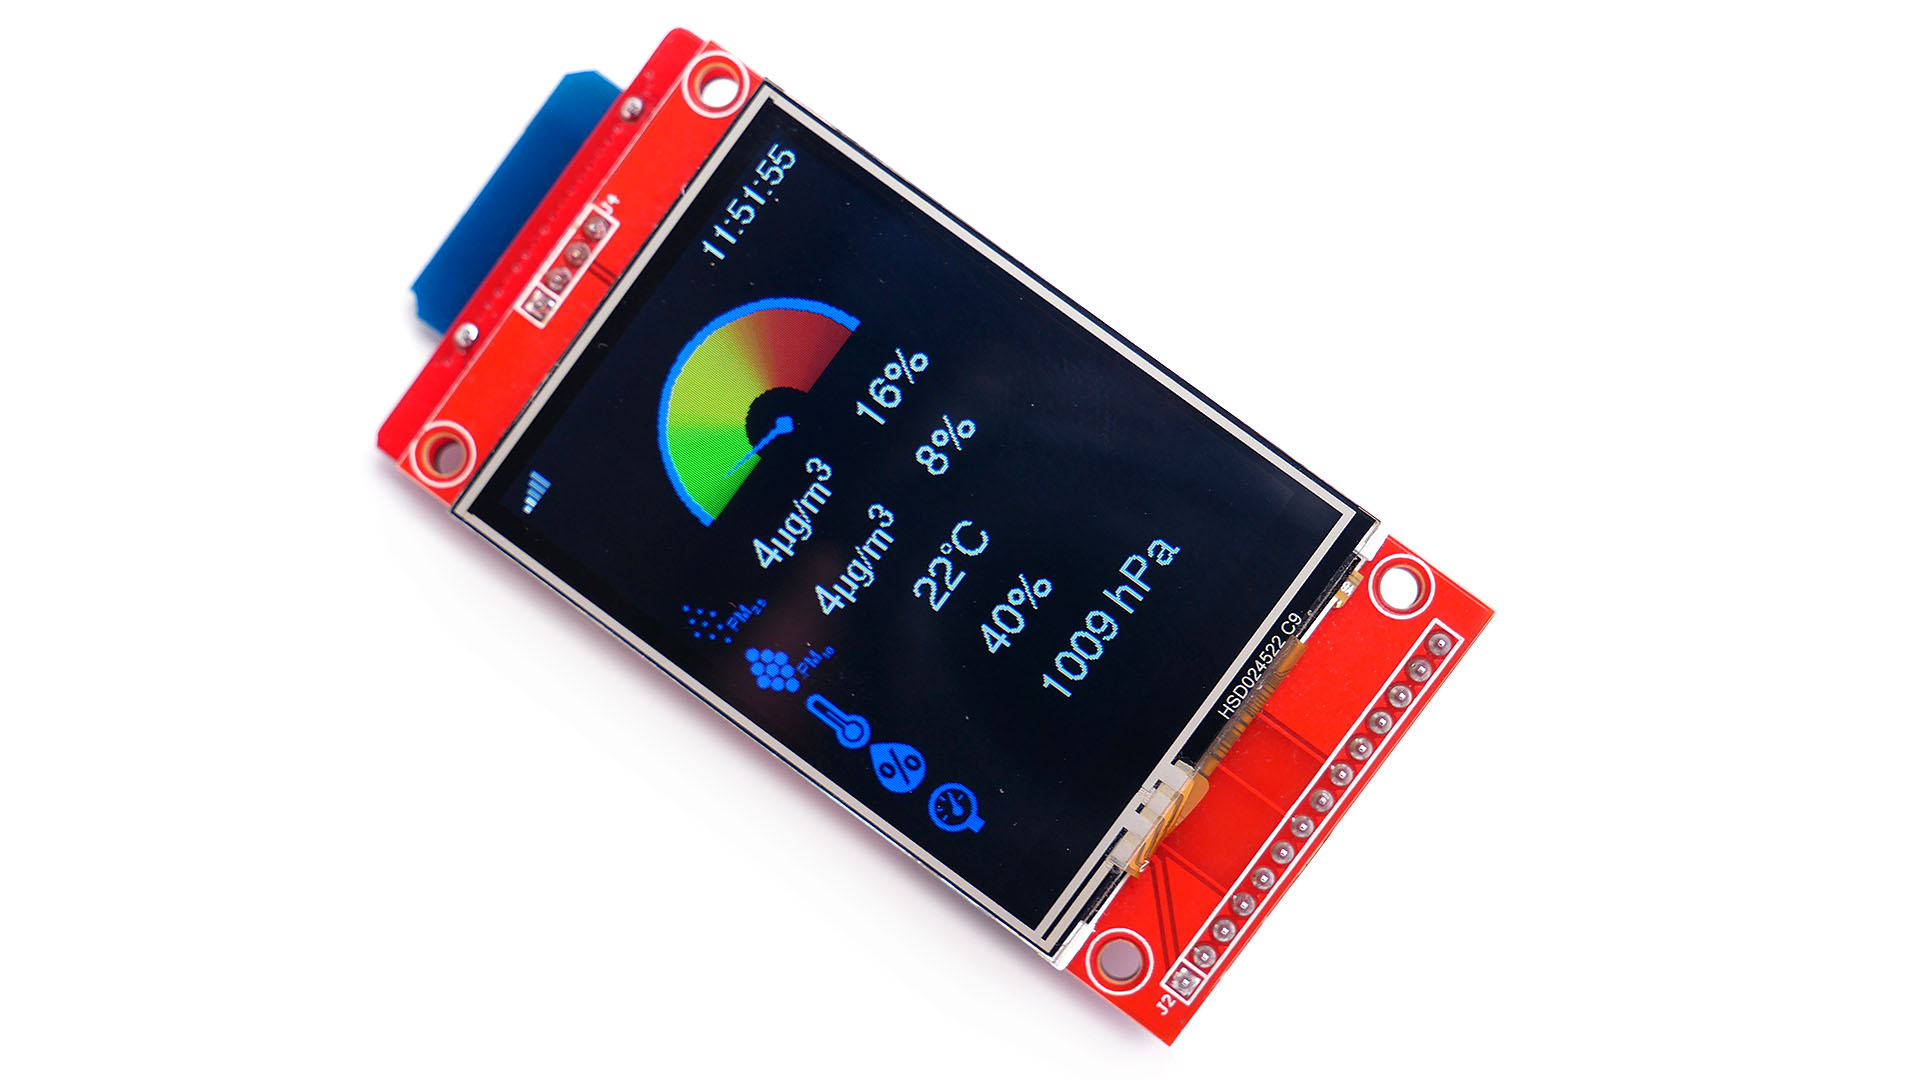
Step 1: Components You Need ILI9341 2.8" tft with touch chip Wemos D1 mini (or mini Pro) strip board (min. 36colsx35rows) L7805 voltage regulator IC + heatsink 5.5x2.1 power socket 330nF capacitor 100nF capacitor full size SD card (or micro SD with adapter) single row male and female header wires micro USB cable for program download
WEMOS D1 Mini ESP32 Minikit Dual Core 240MHz WiFi Bluetooth
D1 mini: D1 mini Pro: D1 mini Lite Next Previous. © Copyright 2021, wemos.cc Revision 14220f49.
WiFi scanner with Wemos D1 mini Rob's blog
In our modified circuit, the Wemos D1 mini is not operated with the 5V supply, but with 3.3V directly from the measuring circuit. If the Wemos D1 mini is supplied with 5V via the USB connection, the battery monitor must be disconnected from the 12V supply and from the shunt. Otherwise there will be a double feed and the Wemos D1 mini or the PC.
Jual WeMos D1 Mini NodeMcu Lua
Desktop NTP / Internet Clock using WEMOS D1 Mini ESP8266,1602 LCD, and 3D Printed Enclosure - Noob's Project.Hi everyone, it's been a few weeks now that I'm.

Wemos B6 I2c Bmp2801602 Lcd Learn Iot With Arduino Esp8266 Device Images
Wiring things up. Now for the wiring of the screen. Connect the following screen pins to the following wemos d1 mini pins. Screen on the left, wemos pins on the right. GND -> (wemos) G pin. VCC -> (wemos) 5v pin, 3.3v may work too. SCK -> (wemos) D5 pin. This is the d1 mini SCLK pin from above. SDA -> (wemos) D2 pin.

(18) Connecting a Wemos D1 mini and a 128*64 LCD Zonnestroompanelen in Nederland
Step 1: Connecting the Rotary Encoder First, let's connect the rotary encoder to the WeMos D1 Mini. The rotary encoder has five pins: CLK, DT, SW, +, and GND. Connect them as follows: : This pin is responsible for detecting button presses. Step 2: Connecting the 2004 LCD Display (External regulated power source)

Digital clock NTP Wemos D1 ESP8266 with LCD 128x64 YouTube
Using LCD with Wemos D1 Mini ESP8266 with Arduino - YouTube © 2023 Google LLC How to use LCD1602-I2C or LCD2004-I2C, Code and wiring explained and code providedThe best thank you for me is.

WEMOS D1 mini ESP32 IoT Guru Blog
This tutorial shows how to use the I2C LCD (Liquid Crystal Display) with the ESP8266 Wemos D1 Mini using Arduino IDE.
Wemos D1 Mini Boards • Wolles Elektronikkiste
Since the OLED screen works at 3.3 volts and 5 volts it is ideal to use with the WeMos D1 mini. The low power features also mean that if the WeMos is battery powered it will be able to run for longer.. LCD, OLED, SH1106, Wemos, Wemos D1 mini. Related Posts. Mini Red LED Digital Voltmeter 3.3-30V Review. Gikfun Normal Open 2 pin Push Button.
Nettigo Zestaw wyświetlacza LCD z WiFi Wemos D1 Mini z LCD
WeMos D1, D1 R2 & D1 mini Arduino Examples. For more information, see the WeMos website or visit the forum. You can purchase the WeMos D1, D1 R2, D1 mini and various shields from our AliExpress store. GitHub is where people build software. More than 100 million people use GitHub to discover, fork, and contribute to over 420 million projects.

Wemos D1 Mini Boards • Wolles Elektronikkiste
Step 2: Connect the Wires Between the Wemos D1 Mini and the OLED Module. Next step was to find which pins on the Wemos D1 mini to connect to which pins on the OLED module. The Ground (G) and VCC are obvious, but the others were translated from a sketch I found using an Arduino. Wemos -> OLED module. G -> GND.
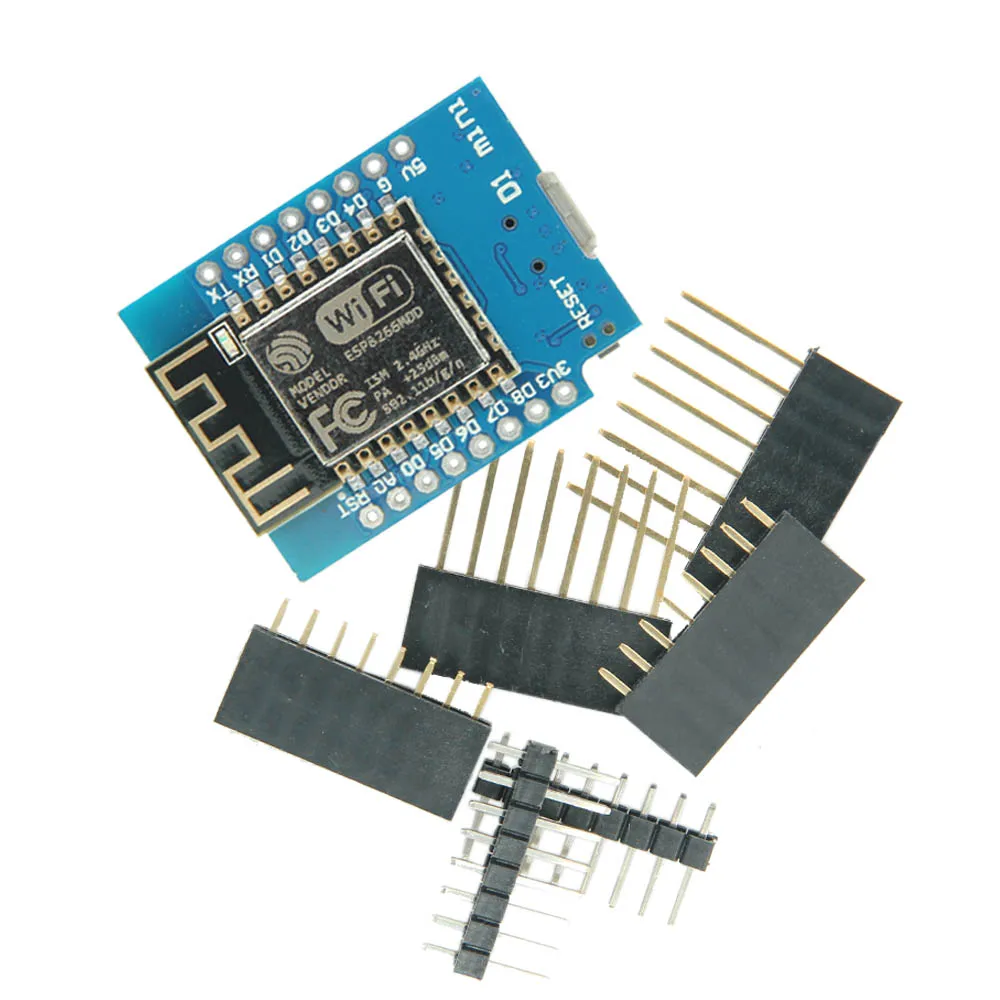
ESP8266 ESP12 ESP 12 WeMos D1 Mini Module Wemos D1 Mini WiFi Development Board Micro USB 3.3V
Wemos.cc official Websit of D1 Mini; ESP8266 Arduino Driver on Gethub; ESP8266 Datasheet (pdf) LCD1602 Library (from Robojax.com) LCD1602 Library (from GetHub) I2C Scanner code; I2C Scanner; Introduction to LCD1602-I2C with code; Robojax Arduino Course on Udemy; Get Early Access to my videos via Patreon; Arduino code for D1 Mini with LCD-1602.
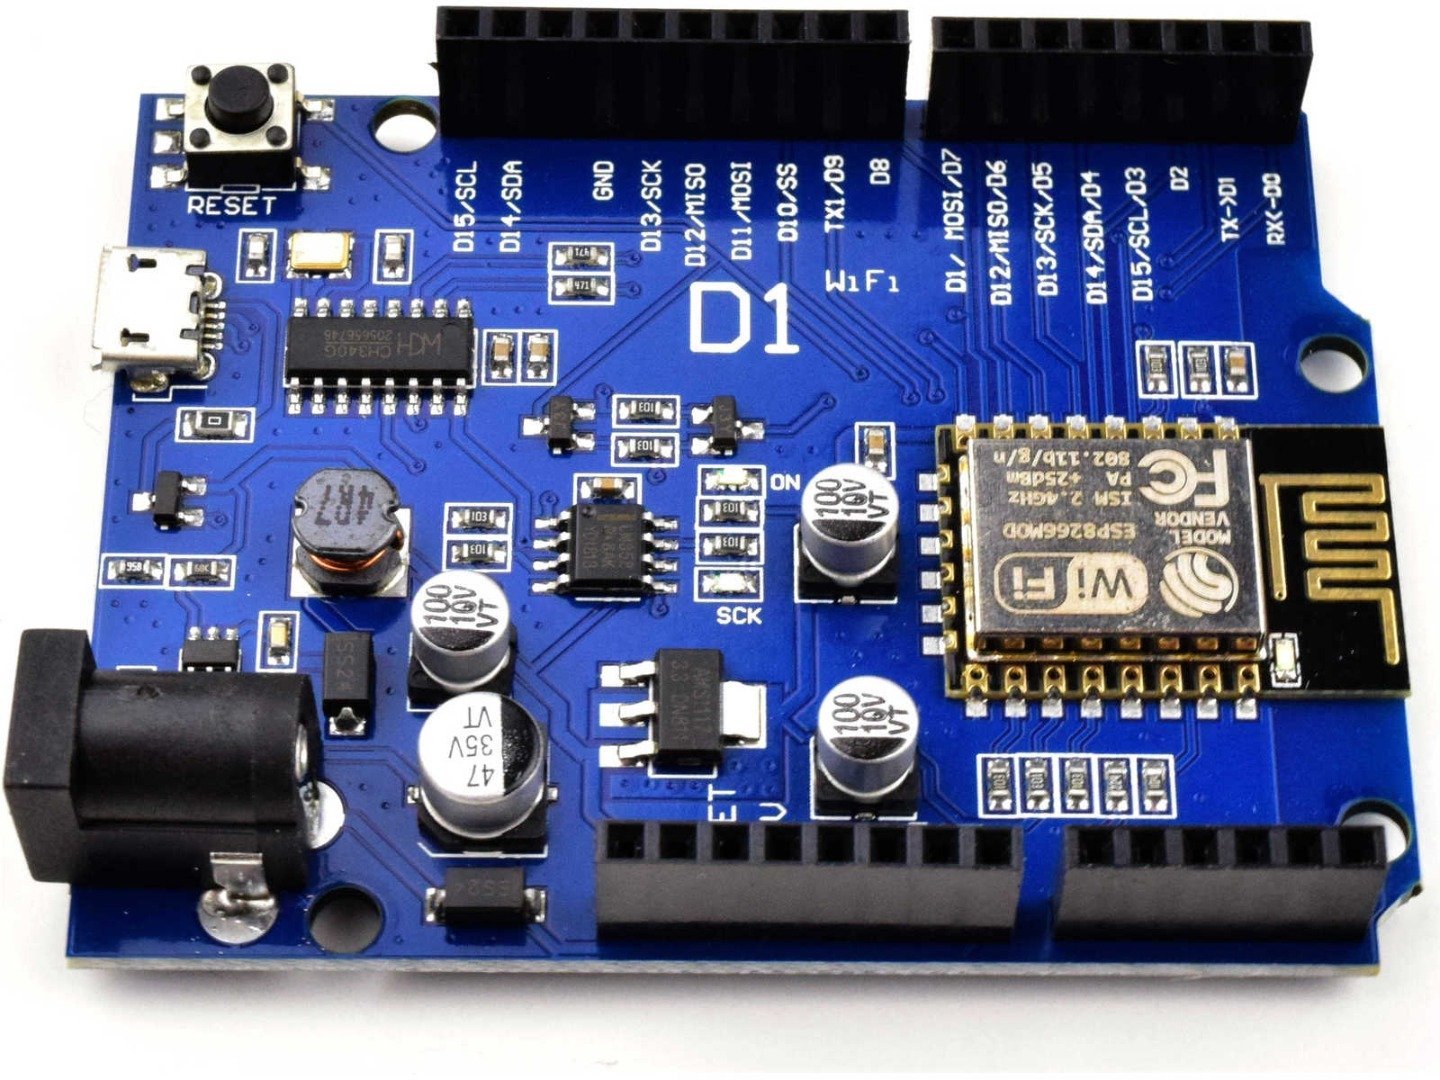
WEMOS D1 Arduino compatible ESP8266 WiFi Board 80160MHz IoT NodeMCU
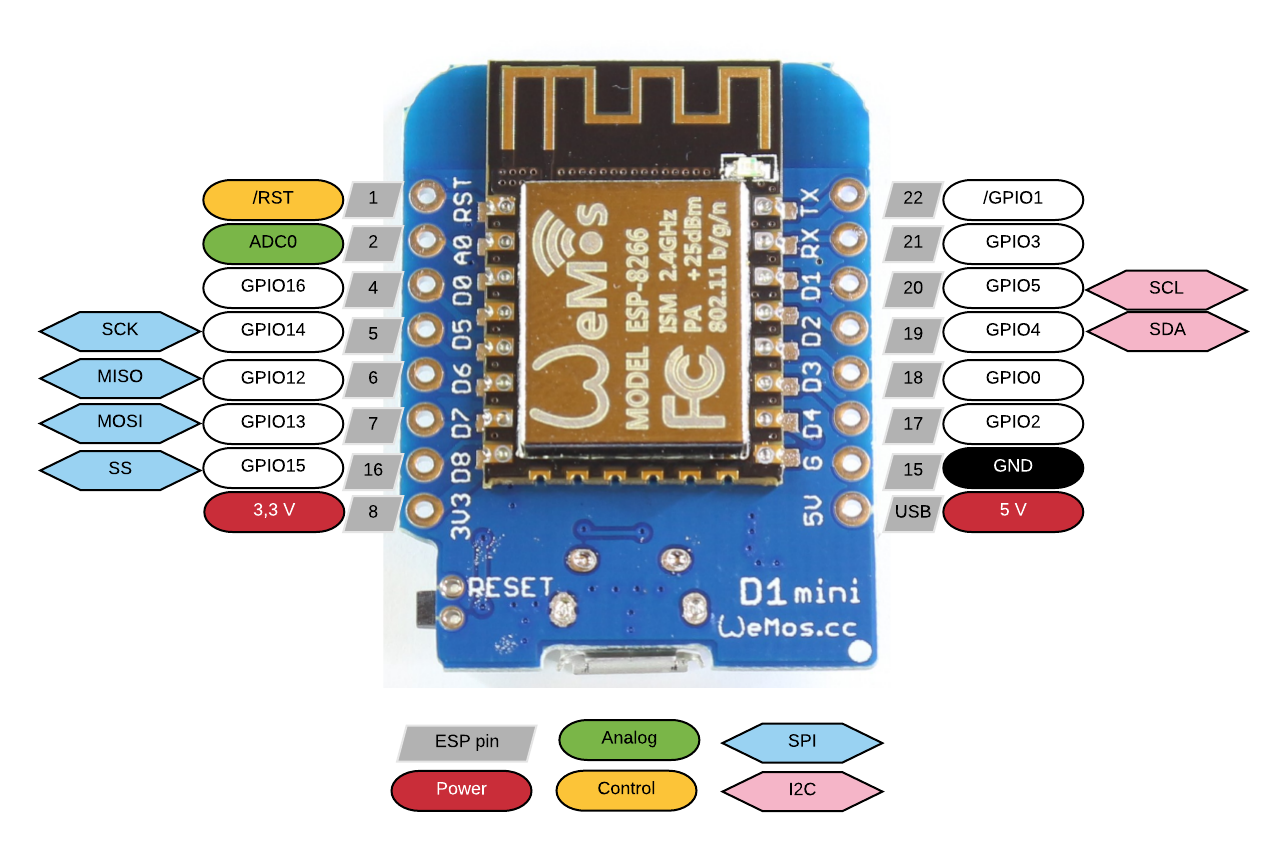
Learn to control I2C LCD with ESP8266 along with pinout, wiring, finding I2C address, adjusting contrast, ESP8266 code, create and display custom characters.. ESP8266 Getting Started ESP8266 Arduino IDE Setup ESP8266 Pinout Reference WeMos D1 Mini Pinout Reference Simple ESP8266 Web Server ESP8266 GPIO Interrupts.

Getting Started with WeMos D1 Mini Microcontroller Tutorials
The Wemos D1 mini is favored because this ESP8266-microcontroller board has a very small footprint and it has wireless communication functionality. Figure 1: A Wemos D1 mini microprocessor board wired via its designated SPI pins with a graphical, ST7920 controlled 128*64 LCD breakout. Electronic components

Wemos D1 Wifi ESP8266 ESP12E Instituto Digital
Connect the GND pin of the 2004 LCD to the GND pin of the Wemos D1 Mini. (If using an external power source, All GND have to be interconnected) 3. Connect the SDA pin of the 2004 LCD to the D2 pin of the Wemos D1 Mini. 4. Connect the SCL pin of the 2004 LCD to the D1 pin of the Wemos D1 Mini. Version 1 - All the connections to the Wemos D1 Mini